STAR Basic Search
- Keyword Search
- Combining Searches
- Date Search
- Other Searches
- The "Ellipsis" button
- Retrieving Records
- Maximum Number of Records to Display
Displaying Your Search Results
Adding Your Library's Holdings to ESTC Records
- Searching Holdings Records
- Displaying Holdings Records
- Editing Holdings Records
- Downloading Holdings Records
To begin matching your list of holdings to the ESTC database, you must first enter your user name and password.
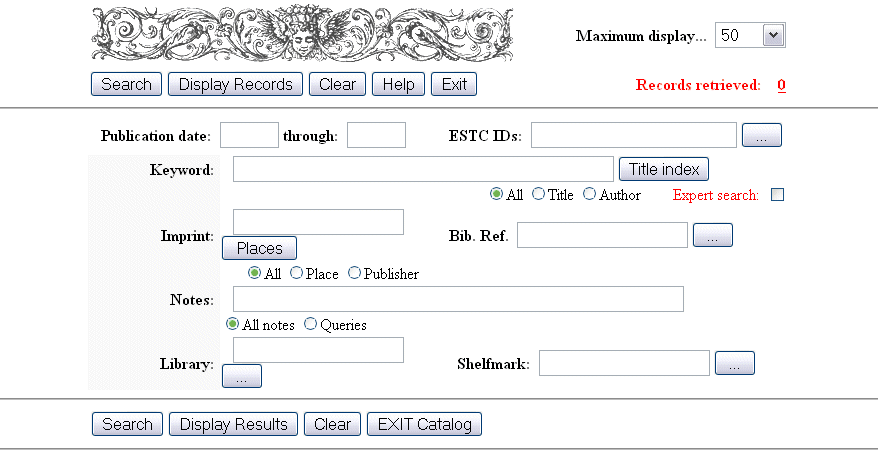
After entering your information and clicking the OK button, the ESTC search page will be brought up in your browser, as shown.
Return to the top of the page.
The main search field for this screen is the "Keyword" field. The database will search all titles and authors for every word entered in the "Keyword" field. If you wish to limit your search to either author or title, click the radio button below the "Keyword" field accordingly:
All words entered are treated as if they are connected by the boolean "AND" expression. In other words, if you enter "England France" the database will search for all records containing both words.
If you want to use the boolean "OR" function, use a backslash between the words. For example, "England \ France" will search for all records containing "England" and it will also search for all records containing "France", but will not specifically look for records containing both.
If you are familiar with the STAR database program, you can check the "Expert search:" checkbox and enter an advanced search using STAR commands (for more information, see Expert search and ESTC available search indexes).
If you have trouble finding records matching your search, you can use the "Title index" function to bring up an alphabetical listing of all records in the ESTC database, which you can then search and browse.
You can combine several fields to narrow your search. For example, you can enter "1750" into the date field and "England France" in the keyword field, and your search will look for all records with both England and France in the author or title, within all books published in 1750. The other search fields can be used in this manner as well.
Searching by publication date is very useful, especially for narrowing down a search on a widely published book. You can search for a specific year, or set a year range. For example, if you wanted to limit your search to records printed only in 1750, your search would look like this:
However, if you wished to include all works between 1750 and 1760 in your search, your search would look like this:
If you know the exact ESTC identification number, that can make your search very quick. Just enter the number in the "ESTC IDs" field:
If you know the Wing number, STC number, or another bibliographic reference, you can search the database using the "Bib. Ref." field:
You can also search by library code, shelfmark, or information in the general notes, if you know them:
The button after the search fields with an ellipsis on it can be used to bring up an alpha-numeric index that allows browsing of the data in that field. It is best to enter data into the search box before clicking the button to give the function a place to start.
This process can take a long time, however. If you find that it is taking too long and want to stop it, hit the "Stop" button on your browser, exit your session in the ESTC search page using the exit button, then restart a new session.
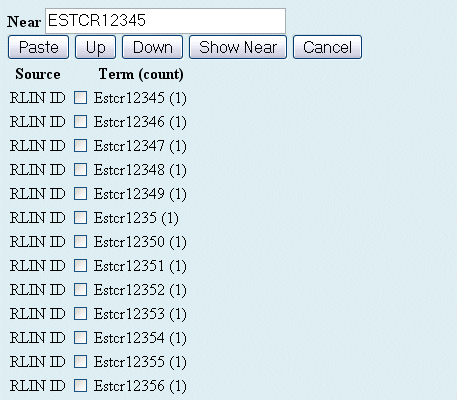
Hitting the ellipsis button will bring up a screen similar to this:
You will notice that the search engine brought up records near the number entered in the "ESTC ID" field. If you wish to see numbered records before what is displayed, hit the "Up" button on this screen. If you wish to see numbers after what is shown, hit the "Down" button. You can also enter another number in the "Near" field and click on the "Show Near" button to begin a new search of the list. Once you find the number you are searching for, click the check box next to it and click the "Paste" button. This will take the selected number and add it to the search field on the main search screen.
After typing in your search, click the Search button. The number of hits is indicated beside the "Records retrieved:" in red. When your search has been narrowed to a reasonable number of records, click the "Display Records" button to review a list of the hits to your search. To begin a new search, click on the "Clear" button, as this will reset all the fields so that you can begin your new search fresh.
Maximum Number of Records to Display
In the upper right-hand corner of the search screen is "Maximum Display..." and a box with a choice of numbers ranging from 50 to 1,000. This box sets the maximum number of records from your search that will display. The default is 50 records. If you wish to display more than 50 records, reset the box to a number higher than the number of records retrieved by your search. Then click "Display Records."
Return to the top of the page.
Displaying Your Search Results
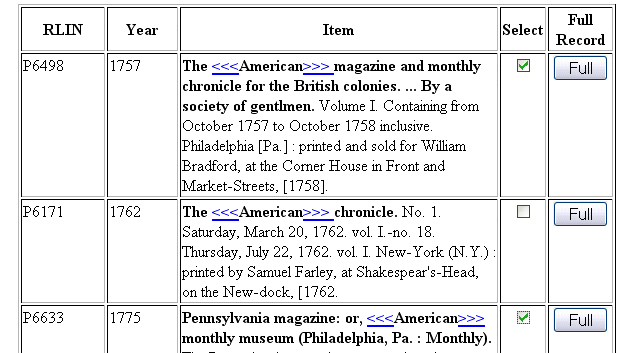
Once you have conducted your search and clicked on the "Display Records" button, you will see a list of records in the default Multiple Records Display format: Brief Records (Table Report). Included in this display are the author, title, and imprint. Note the control buttons for this screen:
If you wish to view these records in a different format, there are three other options:
- Brief Records: Includes bibliographic reference and book format information in addition to what is listed in the table display
- Authors Display: A brief record display highlighting the authors.
- MARC Display: Records are displayed in their entirety with MARC tags.
- Holdings Display: Brief display that includes holdings from all libraries (not just your library).
If you see at once the record you are searching for, click the "full" button to the right of the record, which will bring up a MARC format display of that record in the Single Record Display (see below). You can then edit or add holdings.
If you wish to select only a couple of brief records for fuller display, click the check box to the right of each record you wish to see, then click the "Display Selections" button, shown in the top row of the figure above. This will bring up a full display of each of the selected records.
If you only wish to view one record, it is not necessary to check the select box, just click the "full" button.
Please note: the selections do not automatically clear when you begin another search, but will remain selected until you clear them using the "Clear Selections" button, shown in the top row of the figure above in Multiple Record Displays. This allows you to select many records over multiple searches to display together.
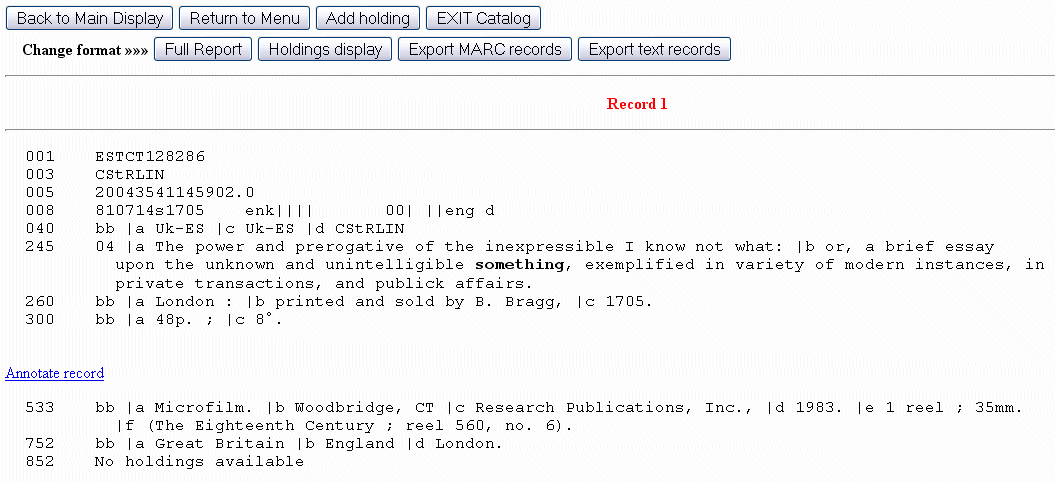
At this point, if you have identified a single record and clicked the "Full" button on the right-hand side, your screen would look something like this:
If you have difficulty reading or understanding MARC format, click on the button "Full Report" for a more readable display.
If you wish to see which libraries hold that particular item, click on the button "Holdings Display."
Once you decide that your copy matches this record, make sure that you are in the MARC display, then check the 852 lines at the bottom of the record to see if your library is already listed.
If you currently do not have a holding matched to the record, there will be an 852 with "No holdings available." At this point you would click the "Add Holding" button to add a new holding to the record.
Remember, the MARC display will only show you your own holdings.
If your library is already matched, verify that the shelfmark, copy notes, etc. are correct. If all your information is correct, then you do not need to enter anything for this record and you can begin another new search by clicking the "Back to Search" button.
If you need to correct something in the existing holding, simply click on the holding to edit it.
If you have a different copy from the one previously matched, click the "Add Holding" button at the top of the screen to add a new holding for the item you have in hand.
To delete an existing item, click on the holding as if you were going to edit it.
Return to the top of the page.
Adding Your Library's Holdings to ESTC Records
Adding a new holding or Editing an existing holding
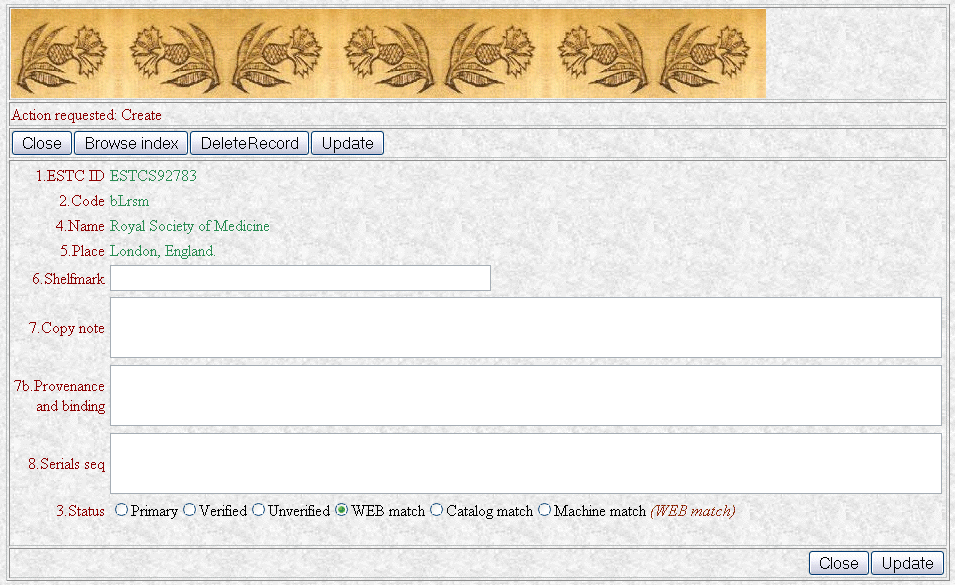
Once you have clicked the "Add Holding" button or clicked on an existing holding directly, an editing form like the one pictured below should appear on top of your MARC display screen. Your library's information will be automatically entered for you and is not editable by you. Enter or edit the appropriate fields and click the "Update" button at the top of the form.
Don't forget to update the status from "WEB match" to "Verifed" by clicking the radio button.
To delete an existing holding, once in the editing form, simply click the "DeleteRecord" button at the top of the form.
If you make a mistake and do not want to actually add a new holding or make changes and you have not clicked "Update", just click the "Close" button at the top of the form and then the "X" in the upper right-hand corner (not shown in figure above).
After you have clicked "Update" or "DeleteRecord" you can now close the editing form. Click the "Close" button at the top of the form and then the "X" in the upper right-hand corner (not shown in the figure above).
Once you have closed the form, you should be back at the Single Record MARC display. To see your changes, click your browser's Reload/Refresh button.
Return to the top of the page.
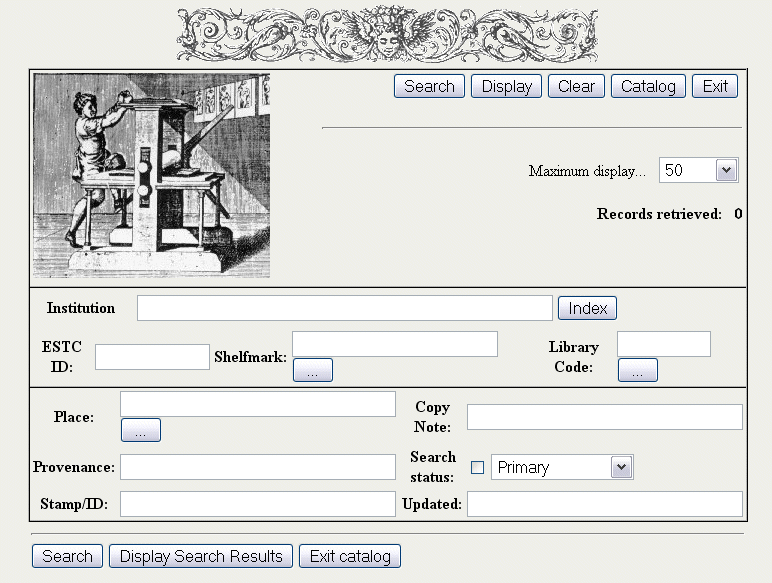
Library holdings for ESTC records are held in a separate database from the bibliographic records. The Holdings Search Interface has been designed for explicitly searching for information entered in these holdings records and not in the bibliographic record.
On the ESTC search page (the ESTC Search Interface), there is now a button labelled "Holdings." Clicking on this will take you to the Holdings Search Interface.
The Holdings Search Interface has the same basic set-up as the ESTC Search Interface. The navigation buttons are all labelled according to their function. Clicking on the button labelled "Catalog" will take you back to the ESTC Search Interface.
Search by:
- Institution -- search the name of an institution and/or browse the index of institutions
- ESTC identification number
- Shelfmark/Call Number -- when you search, put the shelfmark in quotes; you can also truncate it with an asterisk to search part of a shelfmark. For example, if you search "052 B38W", you would get one holdings record. Searching "052"* would get you several .
- Library Code -- use your library's ESTC code and be sure to include the region code
- Place -- location of the institution and not the place of publication.
- Copy Note -- search any word in the field or multiple words using "and" and "or"
- Provenance -- search any word in the field or multiple words using "and" and "or"
- Search Status -- Allows you to search, for example, for unverified matches for your library that need to be upgraded, verified matches that need to be double-checked, web matches that should have been changes to verified matches, etc.
2/3/2006 -- Please note that right now this search functions a little oddly. To search for two different Statuses (i.e. to search for holdings records that are primary copies and then for holdings records that are unverified) you must clear the form between searches. This is a bug we hope to resolve soon. - Stamp/ID -- search by your web-matching user ID.
- Updated -- search by a date that items were last updated. Search by month, day and year, in any order and combination.
- For months, use the first 3 letters: jan, apr, jul, sep, etc.
- For days, use the date number: 1, 12, 31, etc.
- For the year, use a four digit year number: 2005, 2006.
Just as you would do in the ESTC Search Interface, after you have chosen your search term(s), click "Search." If your search results in more than 50 records, click the box next to Maximum Display to increase the number of records that will display. The highest number of records you can display is 10,000. Click "Display" to see your records.
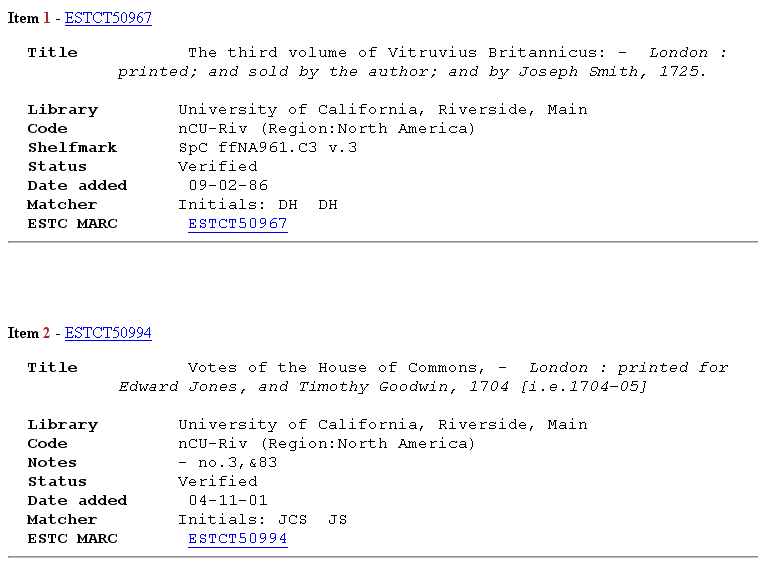
There are two ways to display holdings records:
- Table Display (default): Displays the the records in a table format. The ESTC ID number is a link to a printable format of the bibliographic record to which the holding record belongs.
- Full Display: Displays the holdings records as a list. The ESTC ID number at the top left, next to the item number is a link to the bibliographic record to which the holdings record belongs. The ESTC MARC number is a link to a printable format of the bibliographic record to which the holding record belongs.
To edit a particular holdings record:
In the Table Display click the "More" button for the holding you wish to edit. In the display that opens up, click on the Record number link. This takes you to the Single Record Full Display of the bibliographical record to which the holdings record belongs. Here you can edit your holding as described above in Adding Your Library's Holdings to ESTC Records.
In the Full display, click the ESTC ID number next to the Item number. This takes you to the Single Record Full Display of the bibliographical record to which the holdings record belongs. Here you can edit your holding as described above in Adding Your Library's Holdings to ESTC Records.
After you have edited the holding, clicking the Back button of the browser will take you back to the display of the Holdings record.
Once you have searched and displayed your holdings, you can then create a text file of your search results.
In either the Table Display or the Full Display of your search results, click the button at the top labelled "Export to text format."
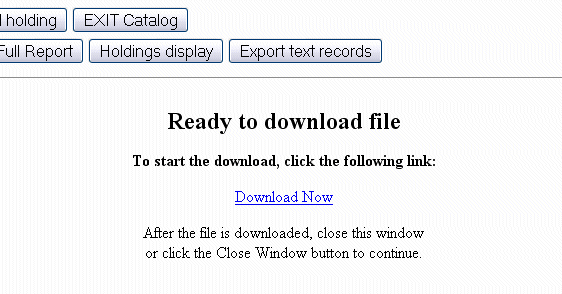
When you click on the button, the computer creates the file and gives you a download link (see image below in Downloading Records.)
To see the contents of the file, click the link.
To save the file to your desktop, right-click the link and choose "Save link as..." from the contextual menu.
Return to the top of the page.
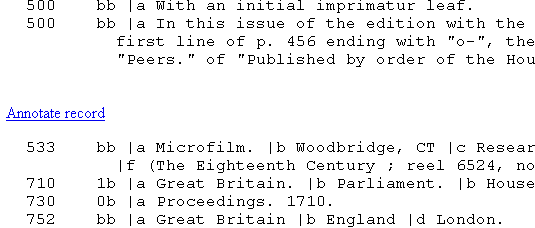
In the single record MARC display or full display (the same displays where you edit or add holdings) click on the "Annotate Record" link.
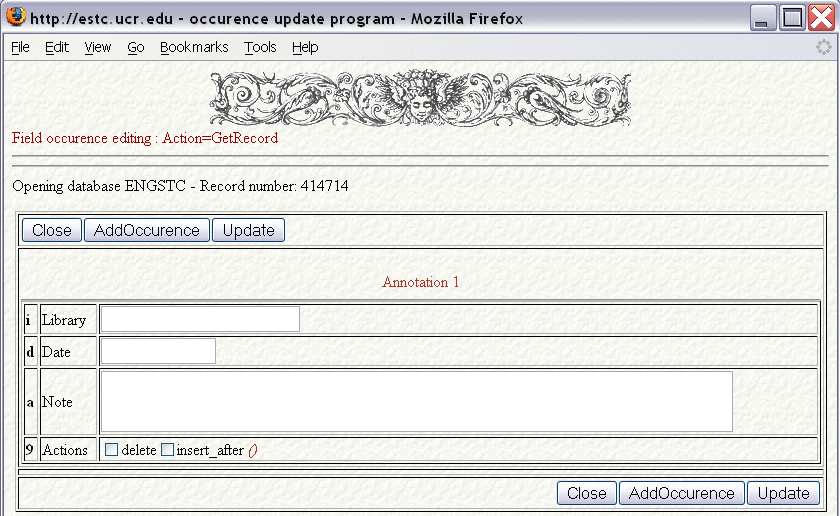
This will open a window with the editing form shown below. Enter your ESTC library code, the date and your query. When you have entered your information, click the "Update" button.
If there is already an existing note or if you need to add more than one note, click the "Add Occurrence" button.
To edit your existing note(s), simply make your changes and then click the "Update" button.
If the ESTC needs more information from you about the item in question, your library will be contacted, probably by email. Conversely, if there is a question about an item or procedure or a question that needs a more immediate response from the ESTC, e-mail estc-catalog@cbsr.ucr.edu.
Just as with the holdings editing form, if you click the "Close" button before you click the "Update" button, your changes will not be saved.
Return to the top of the page.
In the Single Record Display mode, there are two more buttons at the top of the page: Export MARC Records and Export Text Records (See figure above in Single Records Display).
- Export MARC Records: Creates an .mrc file in MARC format.
- Export Text Records: Creates a text file.
With either choice, when you click on the button, the computer creates the file and gives you a download link as seen above.
To see the contents of the file, click the link.
To save the file to your desktop, right-click the link and choose "Save link as..." from the contextual menu.
